The Measurement Import and Configuration Wizards
Creating Configurations Using the Wizards
Configurations were first introduced in the Configurations topic of the Getting Started Guide, then covered more thoroughly in the Configurations in Detail topic of the User Guide. The Getting Started with the Wizards topic in the Getting Started Guide is a step-by-step procedure for creating a configuration using the wizards. The information in this section is the detailed reference material for the Measurement Import Wizard and the Configuration Wizard.
Changes to the Configuration Wizard in MSO v2
To make configuration creation easier and faster, a number of changes to the Configuration Wizard have been made for MSO v2. These include:
-
Automatic association of measurement names to listening positions and sub/main speaker names is now performed when possible.
- This avoids manual data entry in the Measurement Associations wizard page.
- See the Ensuring the Success of the Automatic Measurement Association topic below for tips on how to do appropriate naming to make it work.
-
Creation and management of configuration templates is now done "behind the scenes" without involving the user.
- On the first run of the Configuration Wizard, a configuration template is always created.
- If you wish to create additional configurations with the Configuration Wizard after its first run, it detects that the wizard has already created a configuration template. This means that most of the information needed by the Configuration Wizard has already been specified, so that when running it the second and subsequent times, most of its pages are skipped.
Configuration Types Supported by the Wizards
Depending on your application goals, two types of configurations are supported.
Sub-Only Configurations
Sub-only configurations require only that sub measurements be imported. The optimization is performed on only the subs. This has become by far the most common type of configuration used with MSO. Sub-only configurations support the all five optimization types listed on the Optimization Type property page of the Optimization Options property sheet. When you use a Sub-only configuration, you usually optimize for a flat response. Room correction software, such as Dirac, can then apply more powerful filter resources to achieve a desired target curve more accurately than the simpler DSP hardware ordinarily used with MSO can.
Subs+Mains Configurations
Subs+Mains configurations require that you import measurement data for both subs and main speakers. The integration of mains and subs will then be a part of the optimization. One goal of very early versions of MSO was to substitute for conventional room correction, which at the time tended to do a poor job of integration of main speakers and subs. But people using MSO usually wanted to also use conventional room correction on top of it. Running conventional room correction after optimizing an MSO Subs+Mains configuration undoes the integration work done by MSO. This is self-defeating. In addition, modern room correction like Dirac now does a very good job integrating subs and mains, so this MSO configuration type has become less and less popular over the years and is usually not recommended.
The Samples Used in the Illustrations
In order to illustrate the measurement import and configuration creation techniques described on the next several pages, some sample measurement files are needed. These examples will use the sample files from the Getting Started Guide and the User Guide.
Running the Wizards for the First Time
When you first open up MSO, you are presented with a blank project. In order to do any optimizations, you must add a configuration to it. To add a new configuration, you can invoke the Configuration Wizard. This is done by choosing Config, New From Wizard... from the main menu. If you run this command when no measurement data has been imported yet, MSO will inform you that data needs to be imported, and you'll be presented with a message box asking you if you want to launch the Measurement Import Wizard to import the data. That message box is shown below.
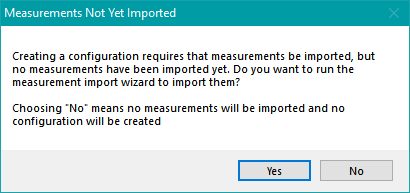
Choose Yes to launch the Measurement Import Wizard.
Importing Your Data With the Measurement Import Wizard
The other way of launching the Measurement Import Wizard is to choose File, Measurement Import Wizard... from the main menu. No matter which way you launch the Measurement Import Wizard, the last page of this wizard gives you the option (enabled by default) to launch the Configuration Wizard when it's done. Choosing this option is strongly recommended, as the creation of your configuration is then driven by wizards from start to finish.
If measurements have already been imported, the main menu's Measurement Import Wizard... command on the File submenu will be disabled.
The Choose the Type of Data to Import Wizard Page
When you invoke the Measurement Import Wizard, you'll first see the Choose the Type of Data to Import wizard page shown below.
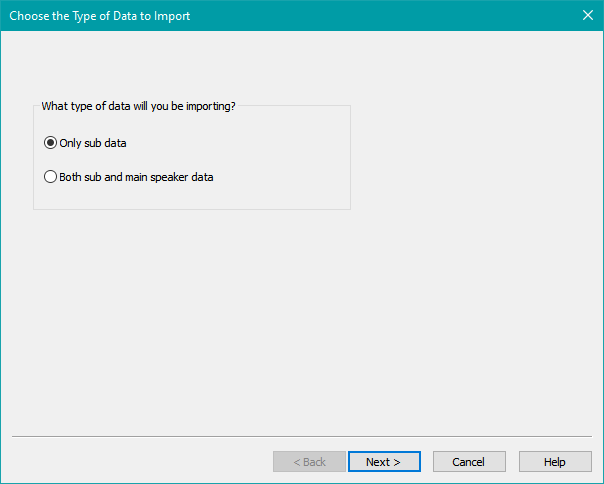
If you are creating a sub-only configuration, choose Only sub data. For a subs+mains configuration, choose Both sub and main speaker data. Press Next when done.
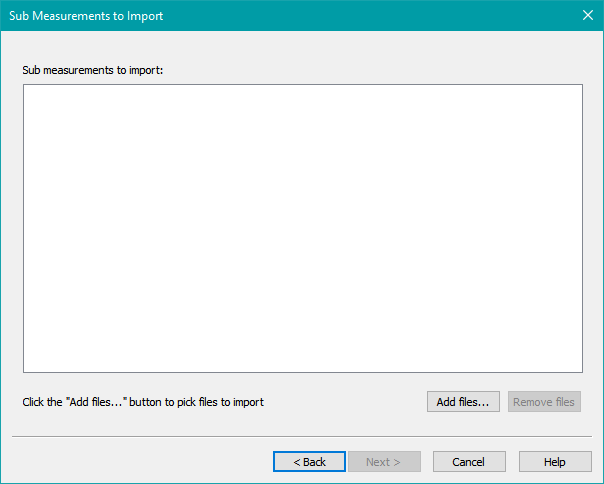
The Measurements to Import Wizard Page
After choosing Next on the Choose the Type of Data to Import wizard page discussed above, you'll be presented with either one or two wizard pages, depending on whether you chose Only sub data or Both sub and main speaker data. Both of these are identical except for some text labeling. The Sub Measurements to Import wizard page is shown below.
When you click Add files..., you'll be presented with a standard Windows File Open dialog as shown below. Select the files you wish to import, then click Open to add them.
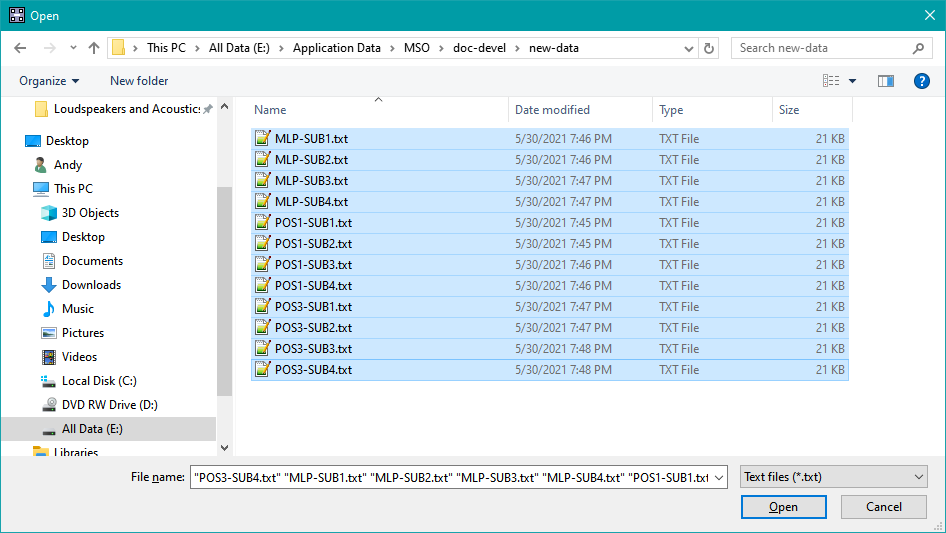
When you choose Open, the files won't be imported yet, just added to the File Import wizard page as shown below.
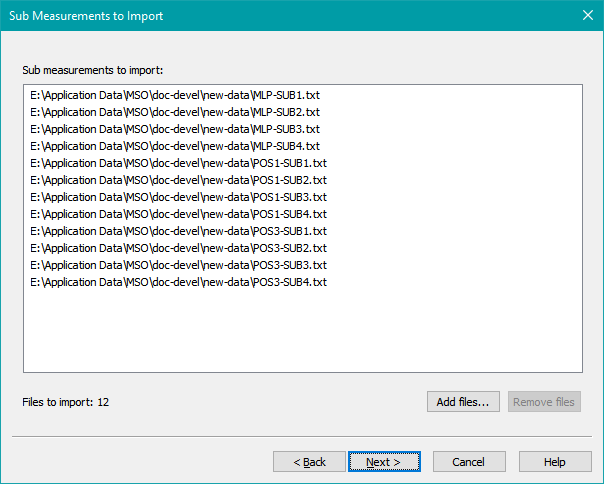
Since the files haven't been imported yet, you can add files you may have missed using the Add files... button, or remove files you may have accidentally added by selecting the files to remove, then using the Remove files button.
If you chose Both sub and main speaker data on the first page of the wizard, you'll be presented with a second File Import wizard page for importing main speaker data. Repeat the steps above to import the main speaker data.
After clicking the Next button on the final File Import wizard page, you'll be presented with the following wizard page.
The Choose Whether to Run the Configuration Wizard Page
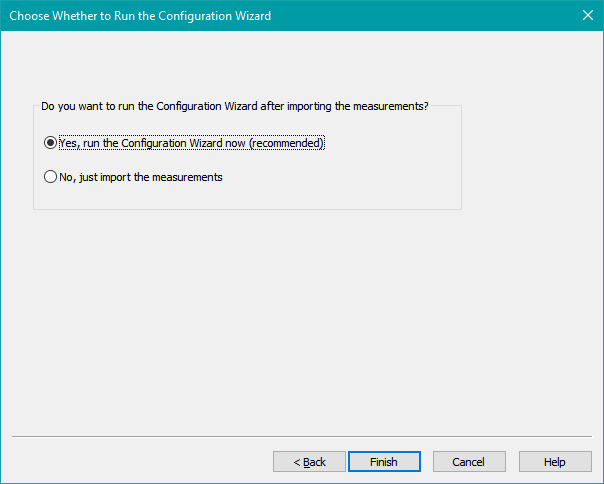
In almost all cases, you'll want to choose the option to run the Configuration Wizard. Doing so is the easiest way to create a new configuration.
When you click the Finish button, the files will be imported. A progress dialog will appear briefly.
Running the Configuration Wizard
When the progress dialog completes, the Configuration Wizard will start.
The Specify the Configuration Type to be Created Wizard Page
If you imported both sub and main speaker data in the Measurement Import Wizard, the Specify the Configuration Type to be Created wizard page will appear as shown below.
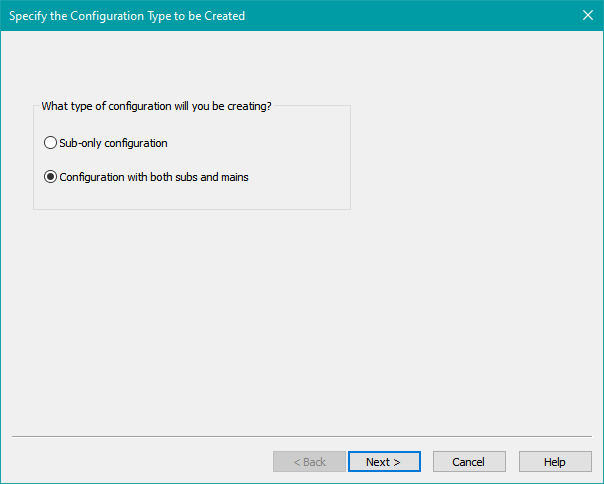
This wizard page gives you the opportunity to create a sub-only configuration if you wish, even if you imported both sub and main speaker data. If you only imported sub data, this page will not appear, as only a sub-only configuration can be created when there is no main speaker data.
In the following discussion, the wizard pages that appear when you've chosen a subs+mains configuration on the first Configuration Wizard page will be shown. Some of these pages will not show up when you've chosen a sub-only configuration. It should be clear which wizard pages do not apply in that case. Showing the pages that appear when a subs+mains configuration is chosen allows for the most complete discussion.
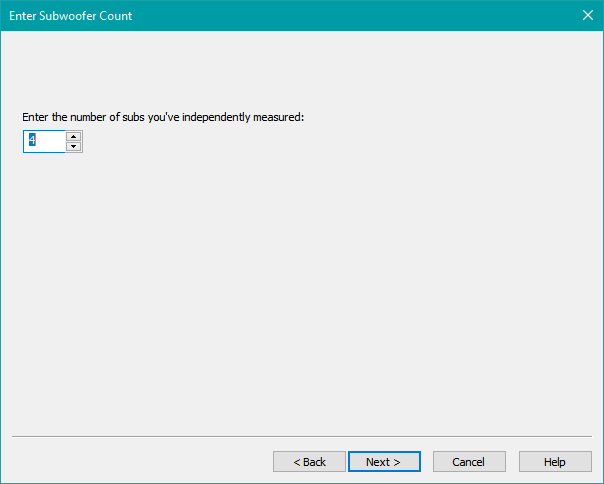
The Enter Subwoofer Count Wizard Page
When you press Next on the above wizard page, the Enter Subwoofer Count wizard page appears.
The Enter Main Speaker Count Wizard Page
If you chose to create a configuration with both subs and main speakers on the first page of the Configuration Wizard, you'll see the Enter Main Speaker Count page after pressing Next on the wizard page above.
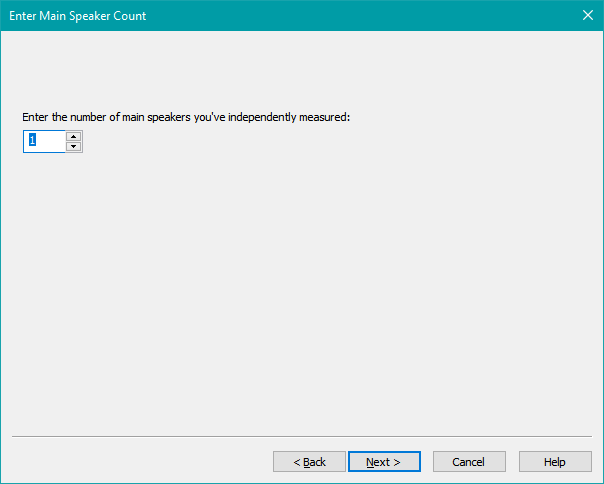
Choose the number of main speakers you've independently measured, then press Next.
The Enter Count of Listening Positions Wizard Page
After you've specified the number of subs (and main speakers if applicable) you've measured, you're presented with the Enter Count of Listening Positions wizard page as shown below.
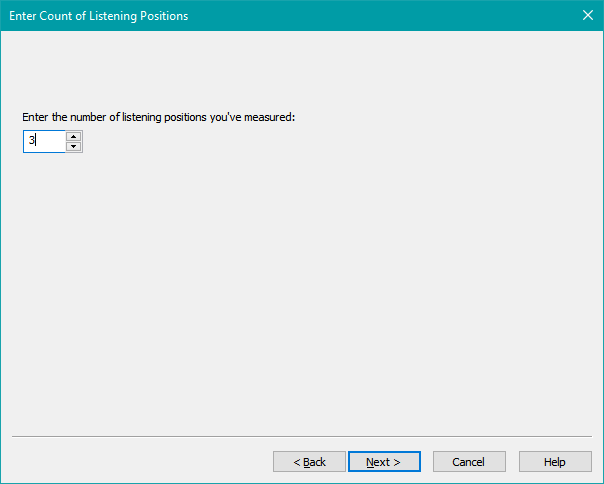
MSO automatically calculates the number of listening positions as the number of sub measurements imported divided by the number of subs.
Choose the number of listening positions you've measured, then press Next when done.
The Choose a Unique Name for Each Sub Wizard Page
After choosing the number of listening positions you've measured, the Choose a Unique Name for Each Sub wizard page will be shown as below.
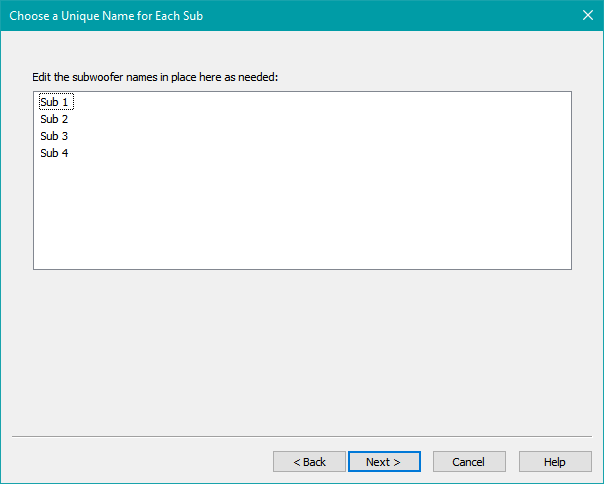
MSO automatically generates subwoofer names for you. If these are close enough to the subwoofer names you chose earlier when exporting the measurements from REW, you can leave them as-is. If you get a warning dialog when choosing Next, the dialog message will contain information about what failed in the name-matching algorithm. Should this occur, you can edit the sub names in place to get them to match the exported measurement files. To edit a subwoofer name, you can either select the name and press F2, or click twice on it (without double-clicking) to activate the edit mode.
Edit the subwoofer names to make them what you want, then press Next when done.
The Choose a Unique Name for Each Main Speaker Wizard Page
If you chose to create a configuration with both subs and main speakers on the first page of the Configuration Wizard, you'll see the Choose a Unique Name for Each Main Speaker wizard page as shown below.
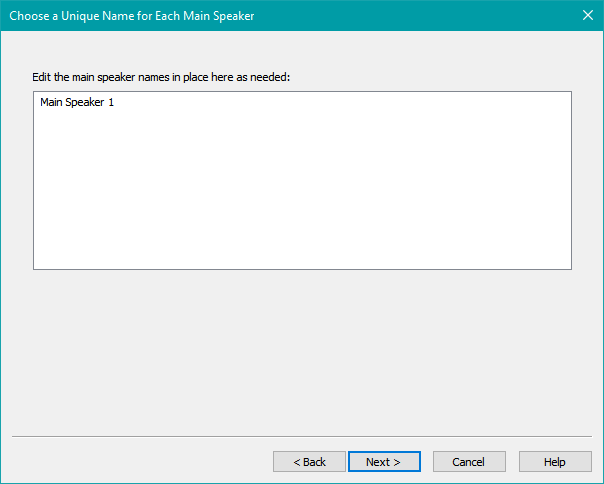
Change the main speaker names as needed, just as you did with the subwoofer names. Press Next when done.
The Choose a Unique Name for Each Listening Position Wizard Page
After choosing the subwoofer names (and main speaker names if applicable), you'll be presented with the Choose a Unique Name for Each Listening Position wizard page as shown below.
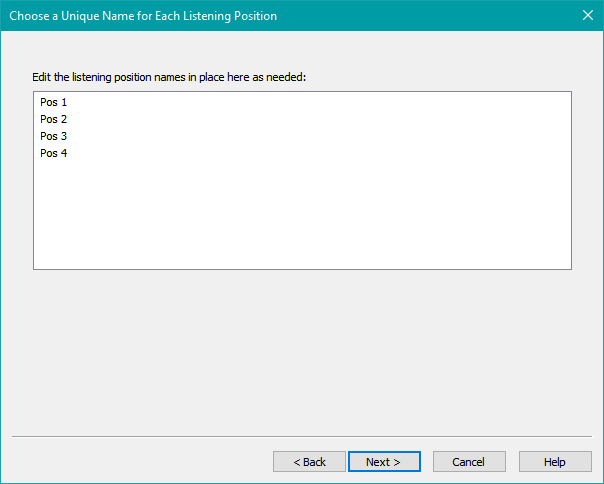
Just as with the subwoofer and main speaker names, the names of the listening positions should be changed if necessary to match the names you used when exporting the measurements. Press Next when done. If you get a warning dialog when choosing Next, the dialog message will contain information about what failed in the name-matching algorithm. Should this occur, correct any listening position names that trigger the warning message until all the listening position names match the exported measurements.
The Measurement Associations Wizard Page
After you've specified the listening position names and selected Next, the Measurement Associations wizard page will appear. Its appearance will depend on whether automatic measurement association was successful. If the automatic association succeeded, the page will look as below, with all entries in the Measurement Name column assigned to a measurement.
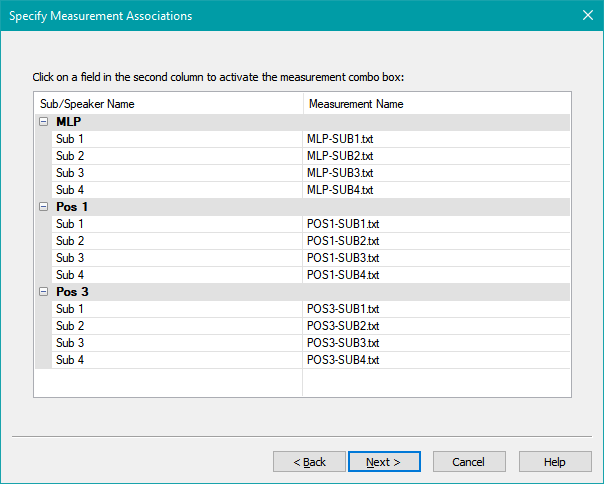
If the automatic measurement association failed, this wizard page will look as below, with all entries in the Measurement Name column unassigned.

Automatic association of measurement names is an "all or nothing" proposition. Either all the measurements are assigned to a combination of listening position and sub/speaker name, or none are. In the latter case, manual assignment is necessary for all measurements.
Manual measurement assignment is shown in the figure below. You assign a measurement to each combination of listening position and sub/speaker by using the combo box associated with each item in the right-hand column. The image below shows this wizard page after some of the associations have been made, and demonstrates using the combo box to choose measurement names for the associations.
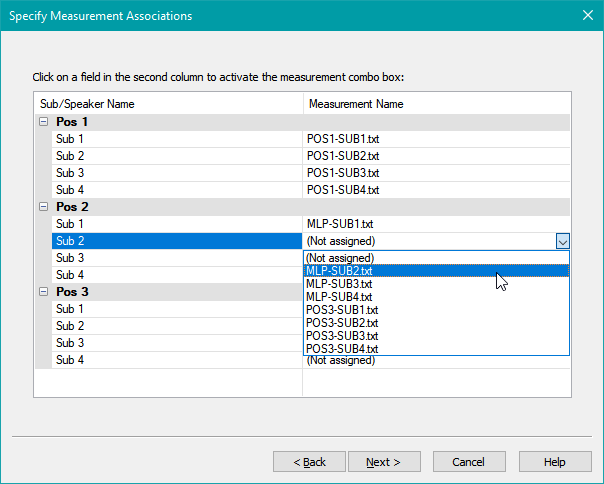
Select Next after all the measurement associations are complete.
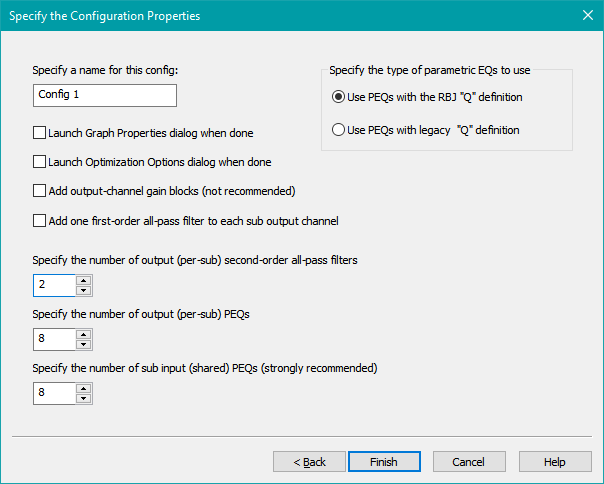
The Specify the Configuration Properties Wizard Page
After all the measurement associations are complete and you've chosen Next on the Measurement Associations wizard page, you'll be presented with the Specify the Configuration Properties wizard page as shown below.
An MSO configuration created by the Configuration Wizard can use the following types of filters.
- Parametric EQ filters (PEQs) in the DSP input channel, sometimes called either "input PEQs" or "shared PEQs".
- Parametric EQ filters (PEQs) in each DSP output channel, sometimes called either "output PEQs" or "per-sub PEQs".
- Second-order all-pass filters in each DSP output channel.
- A single first-order all-pass filter in each DSP output channel (only used in unusual cases).
- A mandatory single delay block in each of the DSP sub output channels except one.
- A mandatory shared sub gain block.
- An optional per-sub gain block (not recommended).
Specifying the Configuration Name
Choose a name for the configuration here. There must not be any other configurations with the same name. Choose a short, descriptive name.
Specifying Whether to Launch the Graph Properties and Optimization Options Dialogs
Although this is the last page of the Configuration Wizard proper, you can get additional wizard-like behavior by choosing the Launch Graph Properties dialog when done and Launch Optimization Options dialog when done options. By selecting these options, you'll be able to set up your graphs and optimization options right away after running the Configuration Wizard. The default checked option for both of these is recommended.
Specifying Whether to Add Output-Channel Gain Blocks
Output-channel gain blocks can be added to improve seat-to-seat variation. They aren't recommended if your goal is to maximize SPL.
An Input-Channel (Shared) Gain Block is Always Added
The shared sub gain block is an important part of the equalization algorithm. The page on configuration details describes the role they play in conventional equalization. MSO puts a shared sub gain block into your configuration even if you choose the recommended approach of not using per-sub gain blocks.
Specifying Whether to Add One First-Order All-Pass Filter Per Output Channel
A first-order all-pass filter in each output channel is usually not needed. Such a need is usually established by a complex manual procedure that won't be described here. It's generally recommended that you leave this option unchecked.
If you have gone through the manual procedure and determined that first-order all-pass filters are needed, checking this option will make creating your configuration a little quicker.
Specifying the Number of Second-Order All-Pass Filters Per Output Channel
Second-order all-pass filters are used in the DSP output channel to get the best possible acoustic phase matching between subs. This minimizes the SPL penalty. Many DSP devices don't support such filters, so check your device's documentation. If your DSP device has support for biquad file import, then it will support all MSO filter types, including all-pass filters.
You can specify a count between 0 and 3 using the spin button control. If your device does not support all-pass filters, choose 0. If your device does support them and you wish to maximize SPL, the most common value used is 2.
Specifying the Number of Output (Per-Sub) PEQs
The purpose of output PEQs is to minimize seat-to-seat variation of frequency response. You can usually do best by using as many as your DSP supports. If you use second-order all-pass filters in the output channels, this will reduce the number of PEQs available. For instance, if your DSP supports 10 output-channel biquads and you've chosen 2 second-order all-pass filters per output channel, you'll be limited to 8 output-channel PEQs here. Select this number using the spin button control.
Specifying the Number of Sub Input PEQs (Strongly Recommended)
Beginning with MSO v2, sub input PEQs are required for the following optimization types (specified on the Optimization Type property page of the Optimization Options property sheet). Each of these optimization types requires at least 4 sub input PEQs.
- Flatten MLP response using only shared (input) filters
- Multi-stage: Maximize SPL, minimize STSV and flatten MLP response
If your configuration doesn't have the required number of input PEQs, the options to choose these two optimization types will both be disabled.
Input PEQs perform conventional equalization of sub frequency responses. If your subs have large frequency response peaks in the absence of equalization, conventional equalization is efficient at knocking these peaks down, especially if the effect of the peaks does not change much with position.
Using sub input and output PEQs, along with two second-order all-pass filters in each sub output channel is the preferred way to get the best possible performance when using the Multi-stage: Maximize SPL, minimize STSV and flatten MLP response optimization type in MSO v2.
Specifying Whether to Use RBJ or Legacy Q Definition for PEQs
Users of miniDSP hardware or other hardware that uses exported biquad text files from MSO to set up their filters need not be concerned about this option, as these differences in definition of Q all "come out in the wash" of the biquad coefficient calculations. Users of hardware requiring manual entry of PEQ Q values, such as Behringer DSP amps, need to take care with this option. The Behringer DSP amps use the RBJ Q convention, while the Behringer DCX2496 uses the legacy Q convention. More information can be found in the filter compatibility section. The most commonly used Q convention in modern hardware is the RBJ Q convention.
Finishing the Configuration Wizard
Press the Finish button to complete the Configuration Wizard. If you have chosen the Launch Graph Properties dialog when done and Launch Optimization Options dialog when done options, these dialogs will appear next, allowing you to set the options for the graph created by the wizard, along with the optimization options for the created configuration.
Additional Configuration Wizard Topics
Below are some topics that don't fit in with the descriptions of individual Configuration Wizard pages.
Running the Configuration Wizard Multiple Times
Detailed information about the simplifications brought about in the second and subsequent runs of the Configuration Wizard can be found in the Running the Configuration Wizard More Than Once topic in the Getting Started Guide.
Ensuring the Success of the Automatic Measurement Association
Manual data entry in the Measurement Associations wizard page can be tedious and time-consuming, especially when many listening positions or subs are involved. An earlier topic on this page introduced the topic of automatic measurement association, which can save a lot of data entry effort. To ensure that the automatic measurement association process is successful requires that the names you choose for measurements, listening positions, subs, and (if applicable) main speakers survive a set of checks on these names. If they do not, warning messages will be shown in the Configuration Wizard and manual data entry in the Measurement Associations wizard page may become necessary.
Care is Required When Choosing Measurement Names
Before even exporting your measurements from REW, you should check their names carefully. This process was covered in the Choosing Measurement Names topic of the Getting Started Guide. One implication of the measurement naming requirement is that if you want to have a listening position named "MLP" (without quotes), then the measurement name must contain "MLP" (without quotes) or the automatic measurement name association may not work. The actual rule is relaxed somewhat in the sense that upper vs. lower case, punctuation and white space are ignored in the name matching. Similar restrictions apply for any listening position names you may also wish to reserve.
Choose Position and Sub/Main Speaker Names Carefully
These names are entered in the Configuration Wizard itself, so you can choose them to match portions of the measurement names. The matching algorithm is discussed in detail below.
The Details of Name Matching
The name matching is intended to be:
- Case-insensitive
- Insensitive to white space
- Insensitive to punctuation
For example, the position name "Pos 1" would match the "POS1" portion of the measurement file named "POS1-SUB1.txt", even though "Pos 1" contains a space and has mixed case. To accomplish this, the matching is done on converted names. All sub, speaker, position and measurement names are first stripped of the following characters.
- space
- form feed
- line feed
- carriage return
- horizontal tab
- vertical tab
- the characters !"#$%&'()*+,-./:;<=>?@[\]^_`{|}~
In addition, the extension of each measurement file name (in this case ".txt") is removed before the characters above are removed. These stripped names are then converted to upper case in a Unicode-compatible way (that is, respecting internationalization). The resulting names must all be unique, so you cannot use names that differ only by the above characters or capitalization. We'll call the names that have been through this process "reduced names".
Taking the example from immediately above, the position name "Pos 1" entered into the Configuration Wizard becomes the reduced position name "POS1". The measurement file named "POS1-SUB1.txt" becomes the reduced measurement name "POS1SUB1". The reduced position name "POS1" is found in the reduced measurement name "POS1SUB1", so it's a match.
Additional Rules
Let's say there are 0 main speakers, 4 subs and 3 listening positions. That makes 12 measurements, which might be as follows:
MLP-SUB1.txt
MLP-SUB2.txt
MLP-SUB3.txt
MLP-SUB4.txt
POS1-SUB1.txt
POS1-SUB2.txt
POS1-SUB3.txt
POS1-SUB4.txt
POS3-SUB1.txt
POS3-SUB2.txt
POS3-SUB3.txt
POS3-SUB4.txt
After going through the name reduction described above, these names are reduced to the ones below.
MLPSUB1
MLPSUB2
MLPSUB3
MLPSUB4
POS1SUB1
POS1SUB2
POS1SUB3
POS1SUB4
POS3SUB1
POS3SUB2
POS3SUB3
POS3SUB4
Let's say you wish to accept the wizard's default name for the first sub, which is "Sub 1". This gets converted to the reduced name "SUB1", which is found in the set of reduced measurement names above 3 times. This is the number of positions, which is correct.
Likewise, let's say you accept the wizard's default name for the third listening position, which is "Pos 3". This gets converted to the reduced name "POS3", which is found in the set of reduced measurement names above 4 times. This is the number of subs, which is also correct.
To be compatible with the automatic measurement name association, the reduced position and sub/speaker names must not only be found in the reduced measurement names, they must be found the correct number of times.
Suppose you wanted to use the wizard's default name for the second listening position, which is "Pos 2". This gets converted to the reduced name "POS2", which is not found in the set of reduced measurement names at all. The following error message will come up, as discussed in a previous example in the Getting Started Guide.
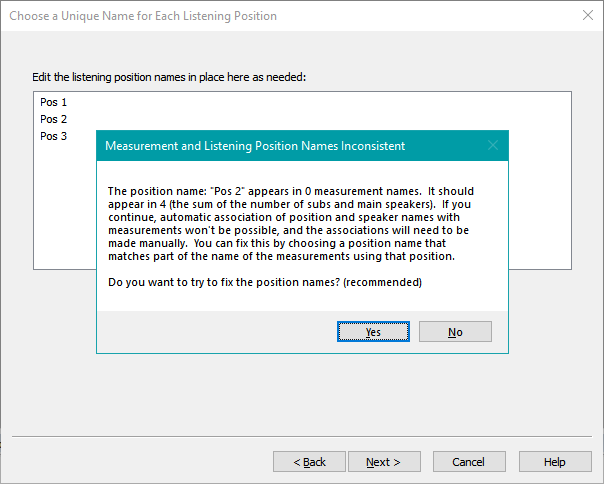
If you choose Yes, and change the listening position name "Pos 2" to "MLP", the name checking will succeed. If you choose No, it will allow you to use the listening position name "Pos 2" anyway, but the error checking mode will switch from strong mode to weak mode.
Strong and Weak Error Checking Modes
The Configuration Wizard starts out using the strong error checking mode when checking the position, sub and speaker names you enter. If all the names you enter pass the tests of strong error checking and there is no other unforeseen error, when you get to the Measurement Associations wizard page, all the associations will have been automatically done for you, saving work.
If one of the names you enter causes MSO to display an error message as shown immediately above, and you choose No when asked if you want to fix it, the wizard will switch to the weak error checking mode for the remainder of its pages. When the weak error checking mode is active, much more lenient restrictions are placed on the names you enter. For instance, names that differ only by capitalization, white space or punctuation are considered unique, so "Pos-1" is considered different from "Pos--1". In this mode, MSO can't do automatic measurement association, so it's strongly encouraged that you fix the error if an error message like the one immediately above comes up.
If you haven't yet pressed Finish on the wizard and you wish to correct any incompatible listening position, sub or speaker names that you've already entered, you can back up through the wizard to a point before where the first problematic name was entered, then enter new names that comply with strict error checking. This will cause the strict error checking to be enabled again, allowing automatic measurement association to occur in the Measurement Associations wizard page.
Using Configuration Templates
A configuration template is created automatically when you run the Configuration Wizard. The template contains most of the saved state of the Configuration Wizard, most importantly the association of each measurement name to its corresponding combination of listening position and subwoofer or main speaker. The configuration template allows you to create a new configuration directly from its context menu. When you do so, a property sheet that's identical to the last page of the Configuration Wizard is launched, allowing you to e.g. pick different numbers of PEQs and all-pass filters for the new configuration. This technique has been largely superseded by the more straightforward technique of just doing an additional run of the Configuration Wizard. The Configuration Wizard has been simplified to detect the presence of a configuration template and use its information automatically if one is present.
How to Access a Configuration Template
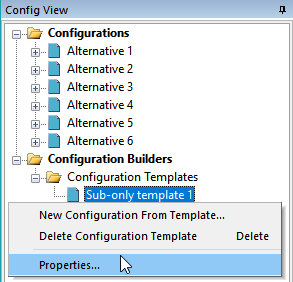
To view a configuration template, expand the Configuration Builders node of the Config View, right-click the node representing the configuration template, then choose Properties as shown below.
The Configuration Template Property Sheet
After choosing Properties from the above context menu, you'll see the property sheet for the configuration template. This property sheet is shown below.
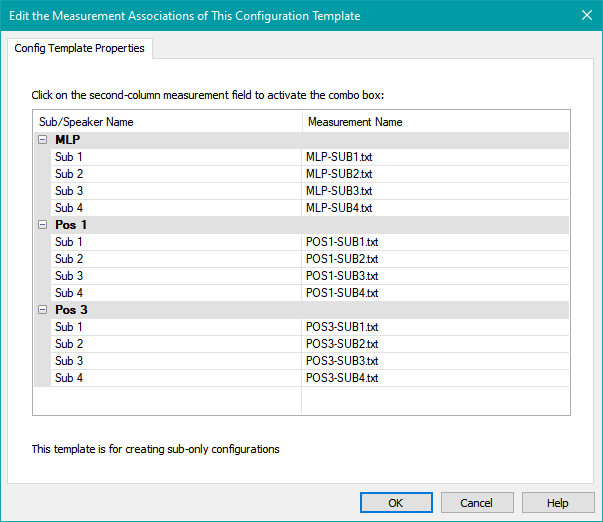
You'll notice this property sheet is almost exactly the same as the Measurement Associations page of the Configuration Wizard.
Double-check to make sure the associations of the measurement names, listening positions and subwoofer or speaker names are correct. If nothing needs to be corrected, press Cancel. If you need to make changes, use the same methods you used for manual editing of the Measurement Associations page of the Configuration Wizard to fix up the associations, the press OK.
How to Create a New Configuration From a Configuration Template
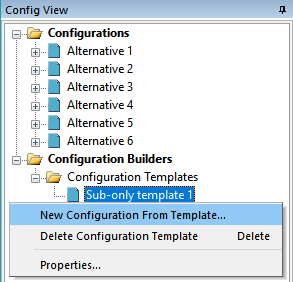
To create a new configuration from a configuration template, expand the Configuration Builders node of the Config View, right-click the node representing the configuration template, then choose New Configuration From Template as shown below.
The Create Configuration From Template Property Sheet
After choosing New Configuration From Template from the above context menu, you'll see the Create Configuration From Template property sheet, shown below.
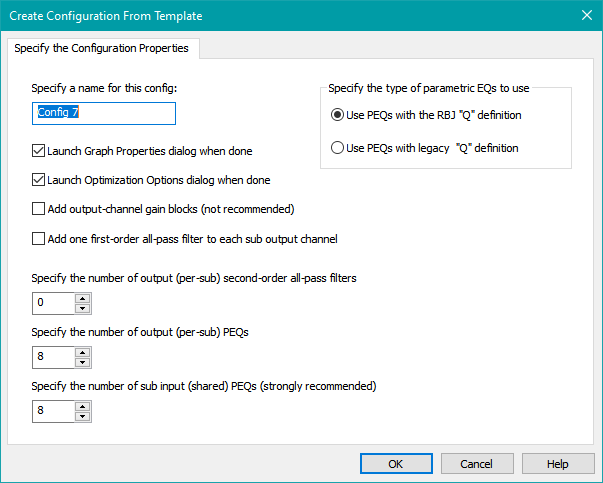
This property sheet is exactly the same as the last page of the Configuration Wizard. For detailed information on how to fill out the entries of this property sheet, see the documentation of the Specify the Configuration Properties page of the Configuration Wizard.