Importing Measurements
You can import three types of measurements: main speaker measurements, sub measurements, and measurements used for plotting only. The first two types are used for the purpose of optimization, and are described below. The third measurement type is used for verification of MSO's predictions only after an optimization is performed, so this type of imported measurement won't be described here.
Importing Main Speaker Measurements
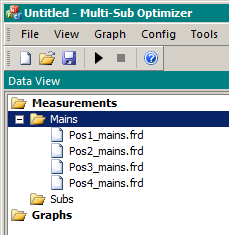
To import main speaker measurements, select the Mains node shown below in Figure 2. Right-click on this node and choose Import Mains Measurements. After choosing this menu selection, you'll get a standard Windows File Open dialog with the default extension set to .frd. Navigate to the folder where you downloaded the tutorial and select the Data sub-folder. There you'll see the .frd files for the tutorial. Resize the dialog if necessary to see all of the files. You'll notice that the provider of these files, Jag768, has helpfully given them names that allow identification of which sub or main speaker is being measured, and what the listening position is. There are four files of mains measurements to import: Pos1_mains.frd, Pos2_mains.frd, Pos3_mains.frd and Pos4_mains.frd, corresponding to four listening positions. Select all four by pressing Ctrl and left-clicking to select each one in turn. Click the Open button of the dialog to import the files. There is a short delay while the software checks the text files for errors and converts the text to numeric data. You will then see four icons under Mains, displaying the names of the four imported main speaker measurement files as shown below.
If you hover over one of these file names, you'll see a tool tip indicating that there is a context menu associated with the imported data. Right-click on one of the file names and choose Show Imported Text. This will create a tabbed window showing the text you imported. This is illustrated below.
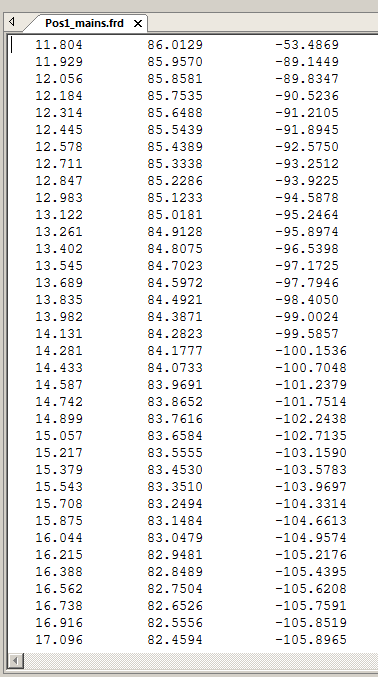
The .frd format is very simple. The first column contains the frequency in Hz, the second the SPL in dB, and the third the phase in degrees. The columns can be separated by spaces or tabs. Not present in this example are comment lines, which are recommended. Comment lines can help by reminding you of information such as which speaker and listening position you measured. The description of this format on the FRD Consortium web page specifies that comment lines begin with the “*” character. MSO allows comment lines to begin with many different characters, so it's not critical that they begin with the “*” character. If MSO determines the line is not data, it treats the line as a comment and preserves it. However, you should avoid beginning comment lines with characters such as “+”, “-”, “.”, “,” or the digits 0 through 9 to prevent them from being mistaken as numeric data. If you are using Room EQ Wizard (REW), you can create the .frd files by using REW's File, Export, Measurement as Text menu sequence. If you have comments in REW's comment field for the measurement, which is recommended, these will be imported by MSO as-is without error. There is no need to edit these files in any way prior to importing them if REW is used to generate them, provided you use the REW menu selection mentioned above to generate the .frd files. If you are using REW in a country that uses the comma as the decimal separator, REW may export the text in that format. MSO will sense the decimal separator when importing and will import the data accordingly. The need to interpret commas as decimal separators in countries using this convention means that commas must not be used to separate data columns – only spaces or tabs. This means you should not save the measurement files as "comma-separated value" (.csv) files.
Importing Sub Measurements
Now you can import the sub measurements. A second way to import measurements uses the main menu. Choose File, Import Sub Measurements from the main menu. This will show the same File Open dialog that we used to import the mains data, but it will now open in the same folder (directory) used before. The easiest way to select the sub measurement files is to select the first file by clicking on it, then press Shift and click the last file. This will select all of the files. Then press Ctrl and left-click on the four mains measurement files (Pos1_mains.frd, Pos2_mains.frd, Pos3_mains.frd and Pos4_mains.frd) you wish to exclude. This deselects them so that only sub measurement files are selected. Click the Open button on the dialog to import the files. There is a delay while the software performs error checking and converts the text of the files to numeric data. Each file name will appear as an icon under the Subs category in the Data View.
If you again right-click on the name of one of the imported files, you can look at the other options on the context menu as shown below.
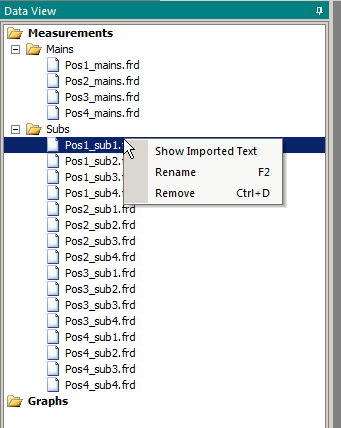
Show Imported Text has already been illustrated. You can rename the measurement from this context menu by choosing Rename or by pressing F2. You can give measurements any name, but the name should be short, yet contain information about which speaker or sub was being measured and what the listening position was. If you chose file names carefully, you probably won't need to rename them. You might want to remove the “.frd” at the end of the measurement name for clarity. Also, once you import the measurements, they become part of the project and are saved with it when you choose File, Save from the main menu. These files need not be present on disk after they are imported. The other option on this context menu is Remove. If you accidentally import Mains data into the Subs category or vice versa you can use Remove to remove the problem measurement from the project. Ctrl+D and Delete also cause the selected measurement to be removed from the project. This operation doesn't affect the original text files on disk. You can then re-import the data to the correct data category as needed in the event of an error.