Example Projects
To perform the tutorial, download tutorial_files.zip to the folder of your choice and unzip it, ensuring that the unzip operation preserves the folders within the zip file. The tutorial contains the folders Data, Project and Sample Projects. The Data folder contains the measurement text files you'll be importing, and the Project folder is empty. The Project folder is where you'll save the MSO project file (.msop file), which is a binary file containing all the information about your project. The Sample Projects folder contains projects that have progressed in various stages and whose data on such items as optimized filter parameters matches up with the illustrations in this tutorial. Before looking at the example, we'll have a brief look at the main window of MSO as shown below. Figure 1 shows the MSO main window when no data has been entered nor any project loaded.
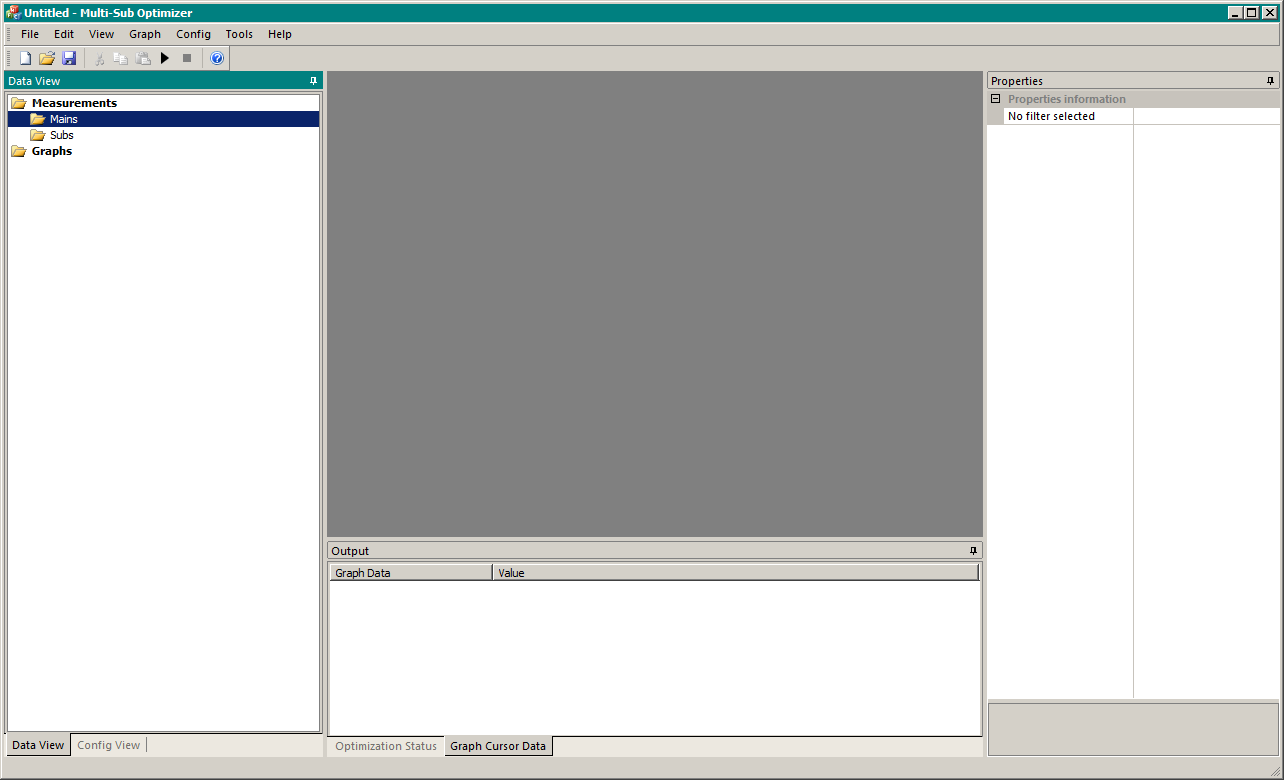
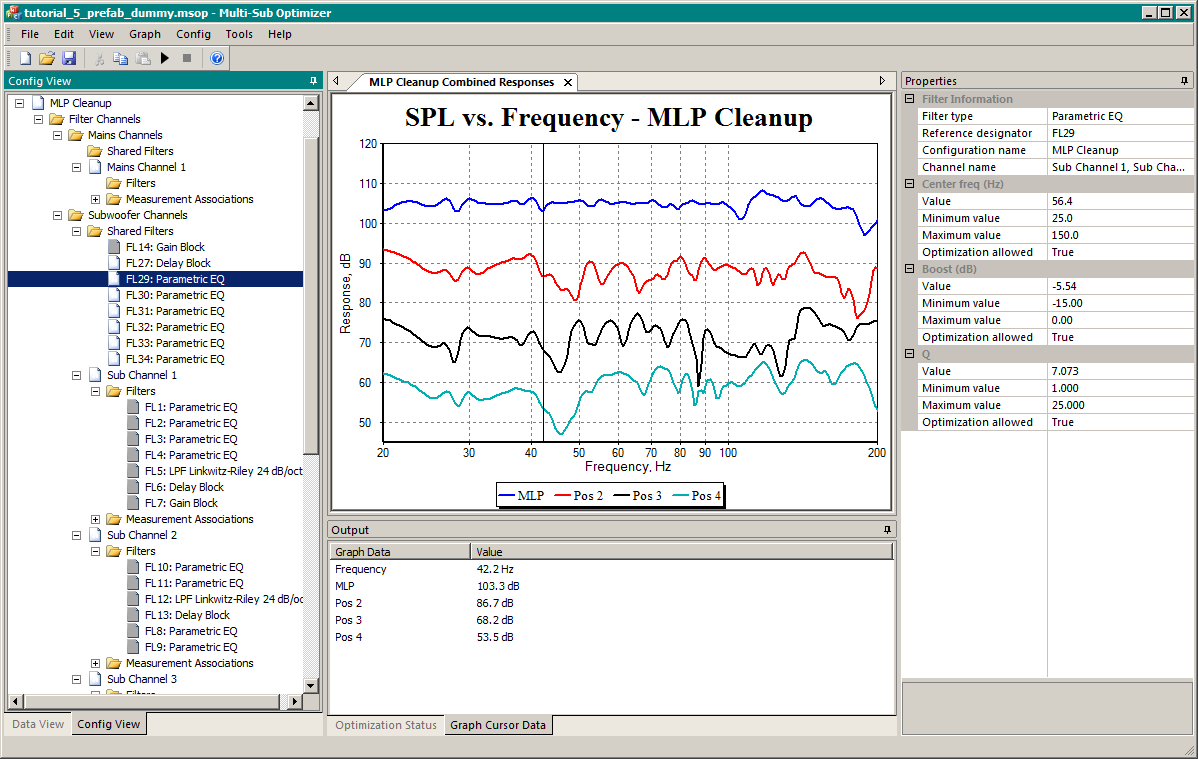
Figure 1a is an example of what the MSO main window might look like after a complete project has been created.
You'll see a typical menu and a small toolbar. The left window pane contains two tabs labeled Data View and Config View. The Data View is for displaying which text files you've imported, and allows you to create and manipulate graphs and their traces. In the Config View, you can define filter channels, add filters to them, associate measurements with them and other activities. Both Data View and Config View are tree views whose nodes, if shown as a folder icon, represent categories of data, and if shown as a document-like icon, represent data added explicitly or implicitly by you. At the bottom in the center is the Output window. It displays various status items such as optimization status if an optimization is being run, or cursor data values if you are tracing a curve on a graph. At the top in the center is an empty area where graphs and text windows will be shown after you create them. On the right side of the main window is the Properties window, also called the Properties grid. When you define filters to be used for EQ, their parameter values and upper and lower limits will be shown there, where you can modify them if needed.
Click on the Data View tab at the lower left of the main window and try hovering the mouse over the text labeled Mains (under Measurements), or its icon. You'll see a yellow “tool tip” pop up. The tool tip provides a hint that you can obtain a context menu when you right-click on this node. It also gives a list of some of the menu options. Right-click on this node and you'll see a context menu with only one choice: Import Mains Measurements. Using this menu, you can import some data. One good way to explore the user interface of MSO is to hover the mouse over various nodes in the Data View and Config View trees. If a tool tip appears, there is a context menu associated with that node. By right-clicking a node that shows a tool tip, you can see what menu options are associated with that node. For the tool tip to appear, the mouse must be on the text or icon of the corresponding node. If the mouse is hovered to the right of the node's text, no tool tip will be shown.
A Note About The Project
This project is different from a typical home theater application. In a typical home theater application, the measurements would be performed with the chosen crossover already in place and bass management enabled. In such a case, no low-pass filter would be added in MSO or via an external EQ, since it is already present as part of the AVR's bass management. For a typical home theater application, only PEQ, delay and gain would be used in MSO and external EQ for each subwoofer filter channel. This project, whose data was provided by Jag768, is different from the usual case in that it uses the multi-sub technique recommended by Earl Geddes. In the Geddes arrangement, the main speakers have no high-pass filter. In addition, the sub measurements were performed without a low-pass filter. In the Geddes approach, individual low-pass filters are added for each separate subwoofer filter channel using an external DSP, and these low-pass filters in general have different cutoff frequencies from one another. For a typical home theater application, you won't add any low-pass filters in MSO or in external EQ.